Panofy SDK — User Guide
On this page
Introduction
You've already trained an agent on Panofy and can chat with it there. But clicking through the web console by hand doesn't scale — you can't have it run automatically, repeatedly, or as part of your own software.
That's what the SDK is for. The SDK (Software Development Kit) is a small toolkit that lets you call your trained agent directly from your own code. Instead of opening a browser and typing by hand, you write a few lines in Python or Node.js, pass in your input, and get the result back programmatically — ready to plug into scripts, backends, or automated workflows.
This guide walks you through the whole path end to end, using a simple "Fibonacci Agent" as the example: it takes a number n and returns the n-th Fibonacci number. You'll create and train that agent (Part 1), then call it from your own code via the SDK (Part 2). Once this minimal example works, swapping in your own agent is just a matter of changing a few values.
Part 1 · Create and Train an Agent
Step 1: Prepare the training description
We recommend preparing a Markdown file first, e.g. fibonacci-agent.md, with content like this:
# Fibonacci Workflow Agent

You are a Workflow Agent callable via the SDK. Your task is to read the field n passed by the caller, compute the n-th Fibonacci number, and return the result directly.

## Call definition

fib(n) -> number

## Input field

- n: a non-negative integer.

Example request:

{ "n": 10 }

## Return value

When n = 10, return: 55

## Rules

- fib(0) = 0
- fib(1) = 1
- fib(n) = fib(n - 1) + fib(n - 2), where n >= 2

## Examples

| n  | result |
|----|--------|
| 0  | 0      |
| 1  | 1      |
| 7  | 13     |
| 10 | 55     |

## Constraints

- Do not ask the user any questions.
- Do not return explanatory text.
- Do not return Markdown.
- Return the final result only.
Tip: If the web console lets you fill in the Description directly and you don't want to upload a file yet, you can paste the core content above into the Description field. For more stable training, however, we recommend uploading this Markdown file as a training document.
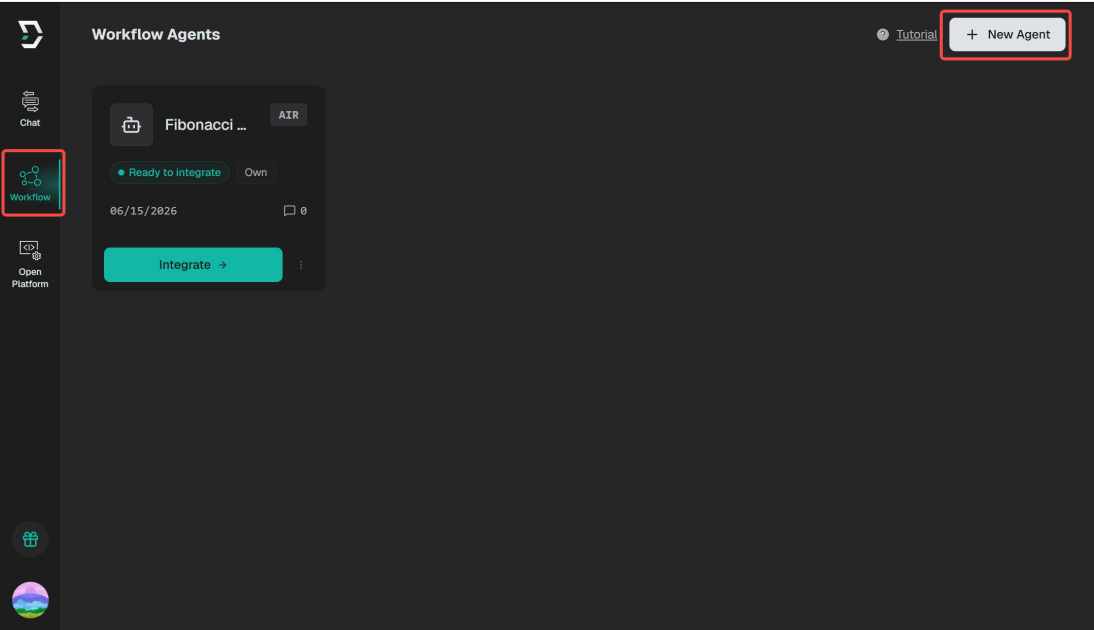
Step 2: Create the Agent
After entering the Panofy console, open the Workflow Agent list page and click "New Agent".
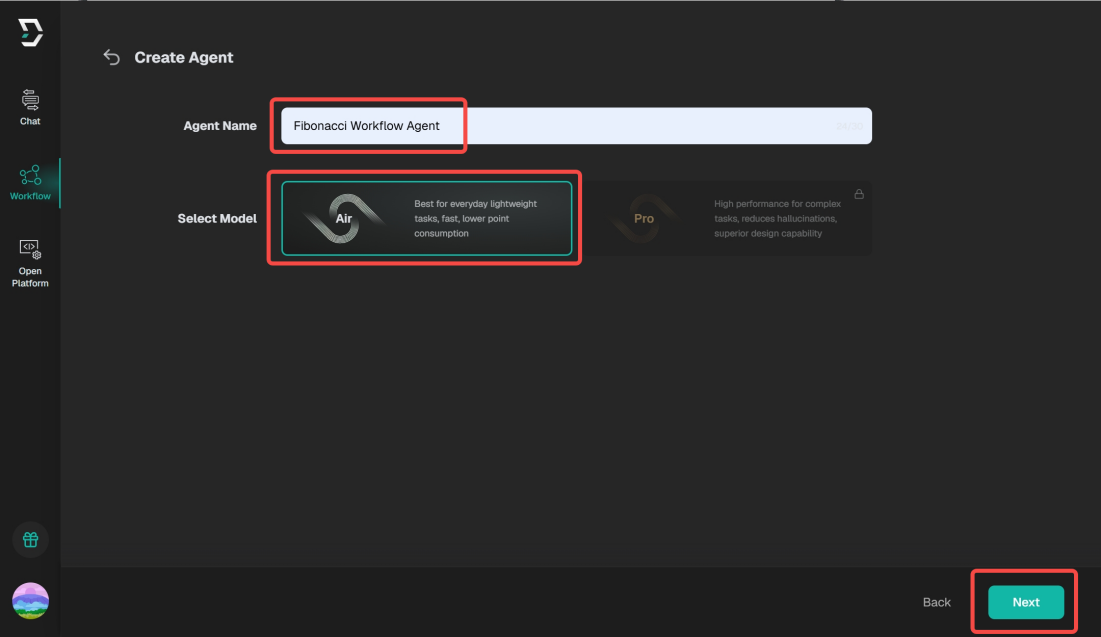
In the "Create Agent" drawer, fill in the basics:
- Agent name: Fibonacci Workflow Agent
- Model: start with Panofy Air; if your plan supports it, you may choose Panofy Pro
Then click "Next".
In the Description field, state what the Agent is for, for example:
This is a Fibonacci Workflow Agent for structured SDK calls. The input field is n, which represents the index of the Fibonacci number to compute. When the caller passes in n, compute fib(n) and return the final result directly. Do not ask the user any questions, and do not return any explanatory text.
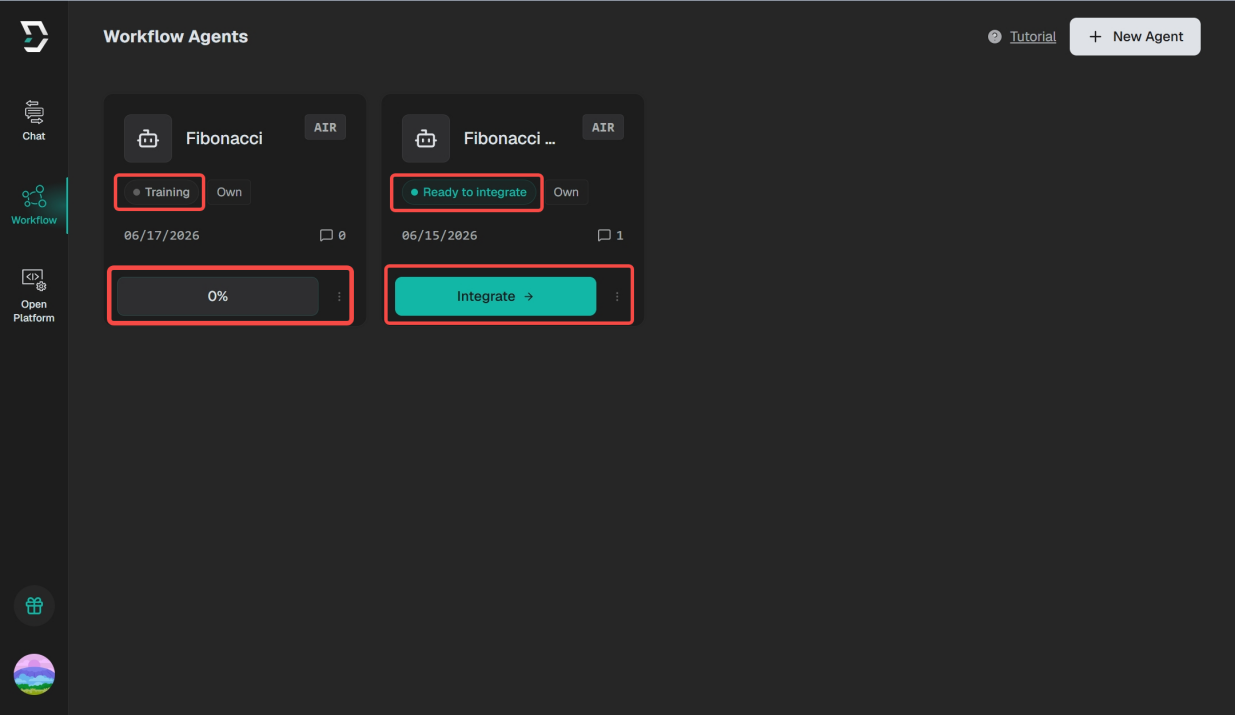
In the "Training Files" area, upload the file you prepared, then click "Start Training".

Once training starts, the card shows a "Training" status with a progress button (e.g. "0%"). Wait until the status turns to "Ready to integrate" and the button becomes a green "Integrate →" — that means the Agent is ready to call. Calling the SDK while it is still training may return an error saying the Agent is not yet callable.
Part 2 · Call the Agent via the SDK
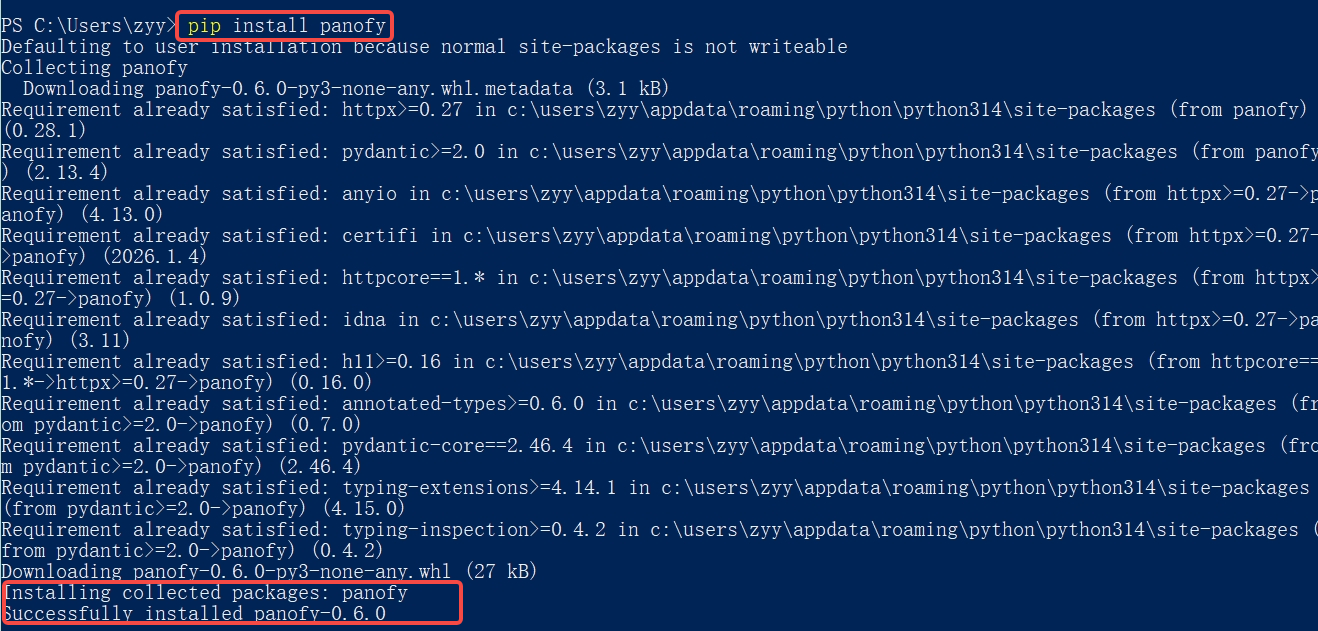
Step 1: Install the SDK
The Panofy SDK supports both Python and TypeScript / Node.js. Install whichever your project uses.
Python
pip install panofy
After installing, the import module name is still panofy:
from panofy import Panofy
TypeScript / Node.js
npm install panofy
# or with pnpm
pnpm add panofy
Step 2: Call the trained Agent
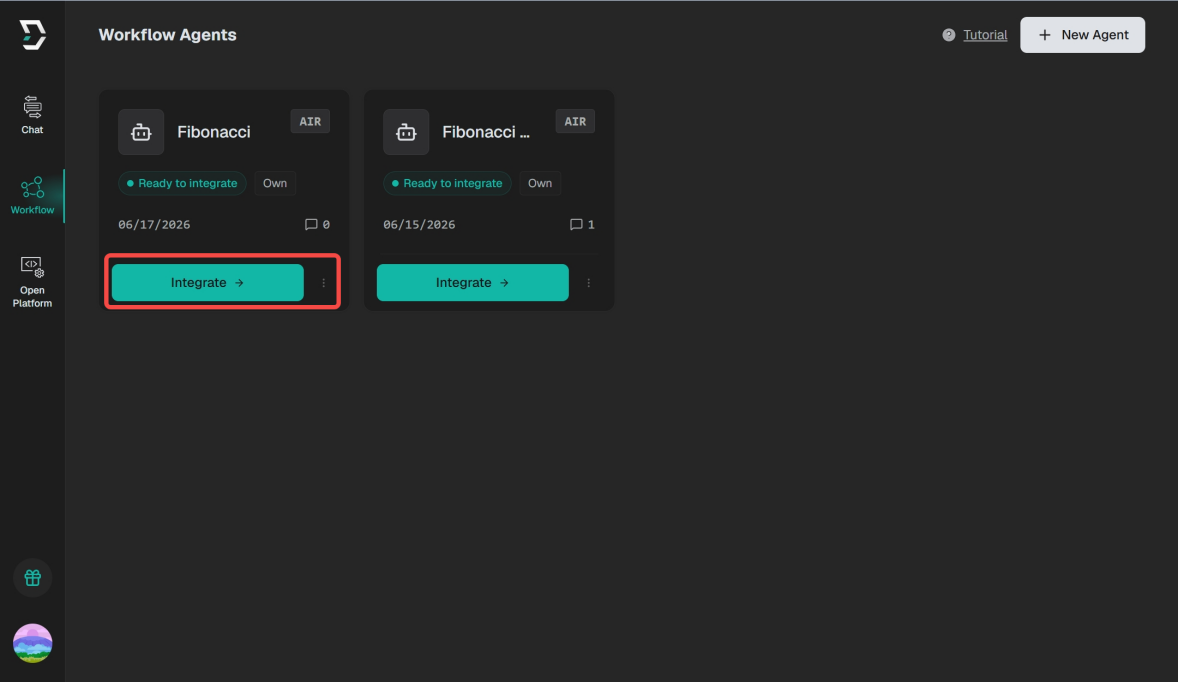
Once training is complete, go back to the Workflow Agent list.
On the Fibonacci Agent card, click the green Integrate.
The dialog shows the Agent ID and a base_url. Copy both and keep them safe.
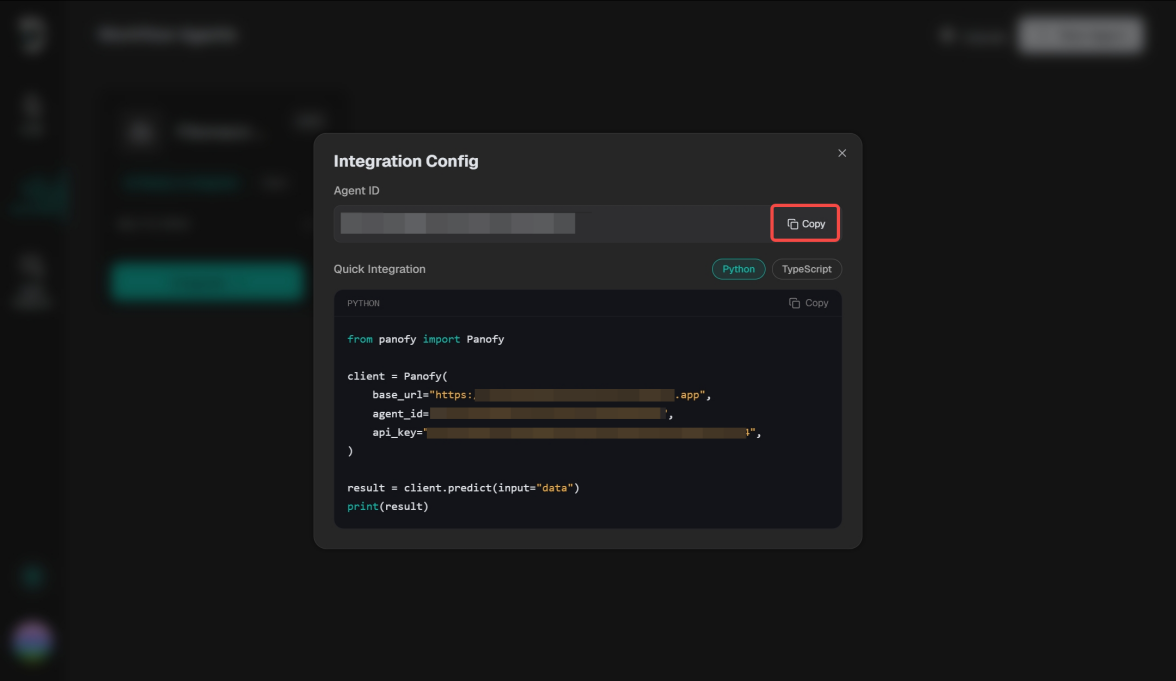
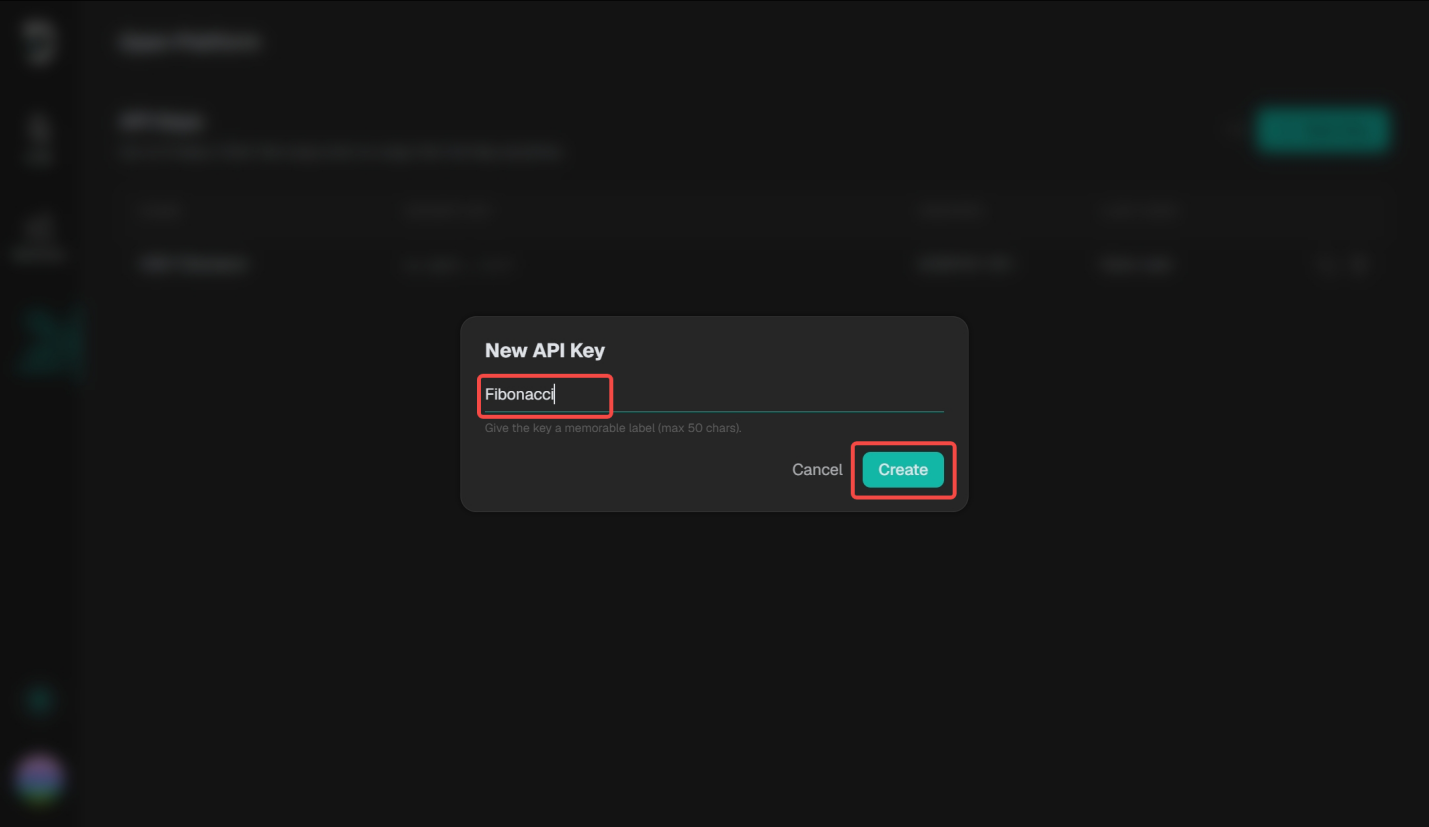
For the API Key: if the sample code still shows a placeholder like your_api_key, open the API Key page (Open Platform), click "New Key".
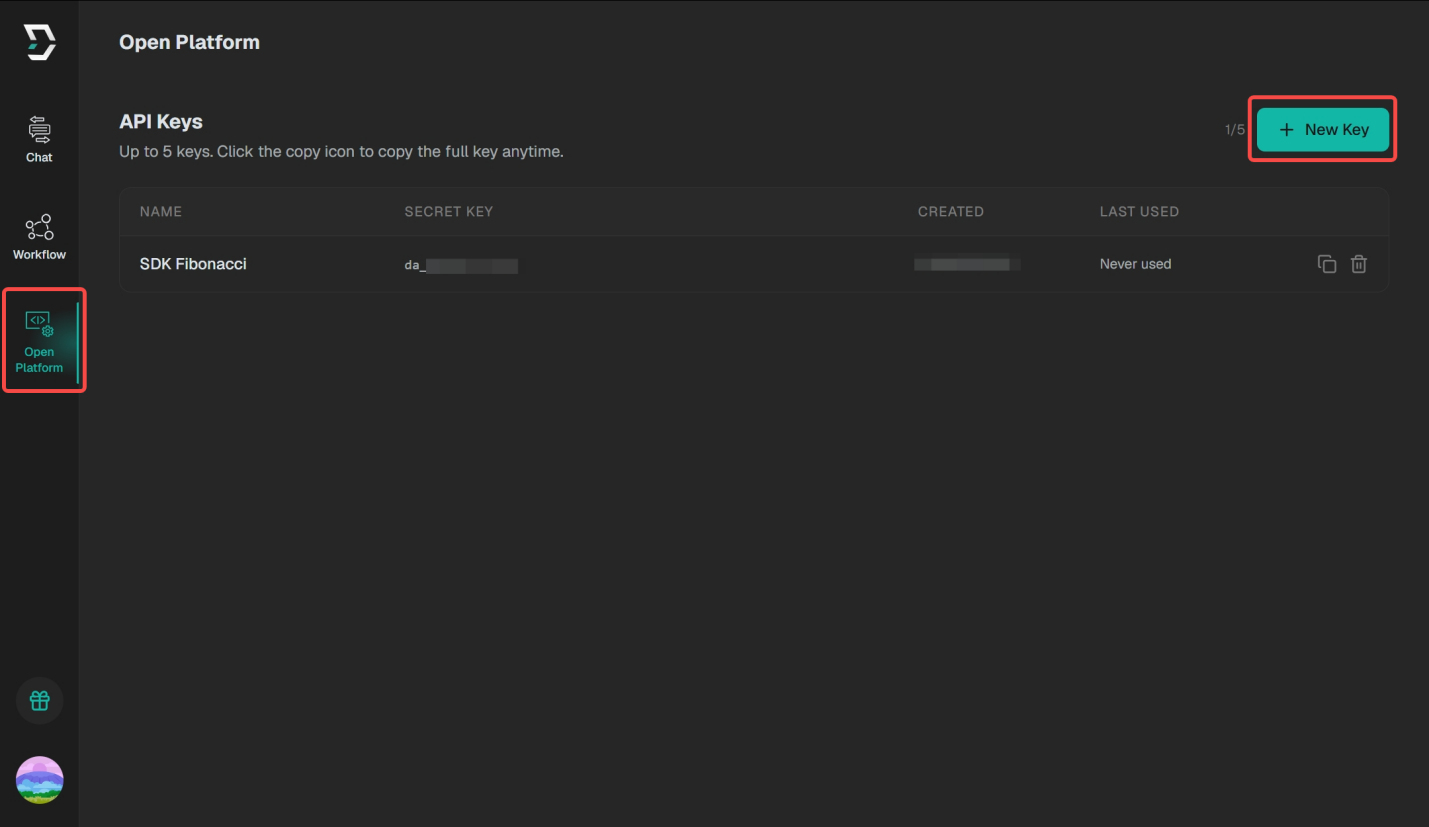
Then copy the full key immediately and store it safely. Use the copy icon in the key list to copy the full key.

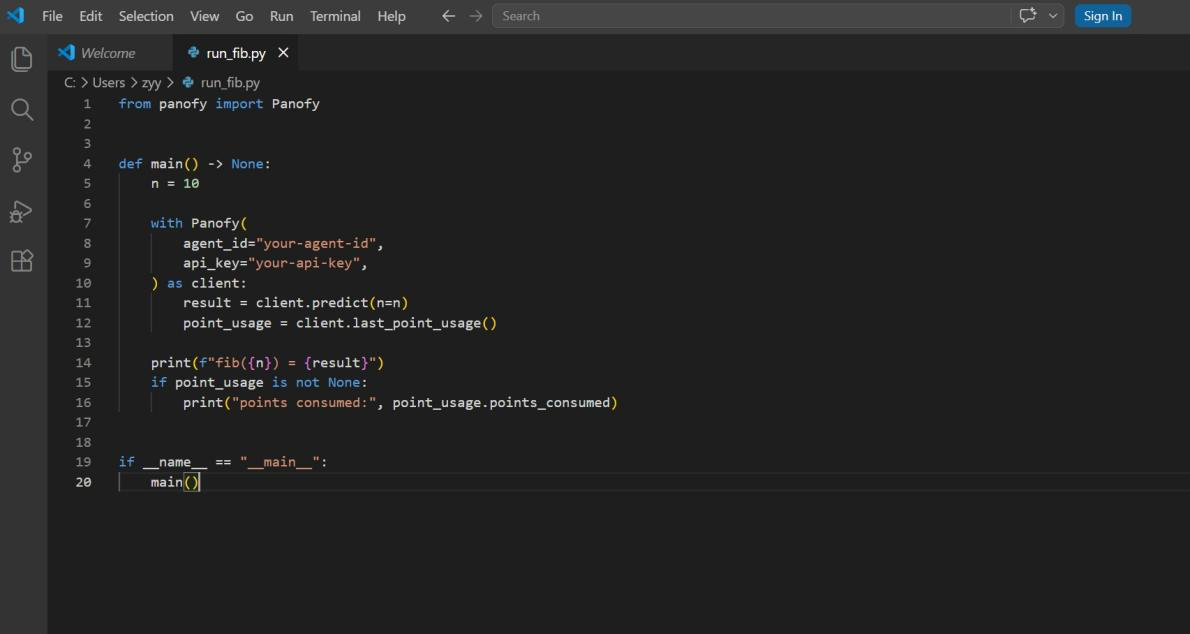
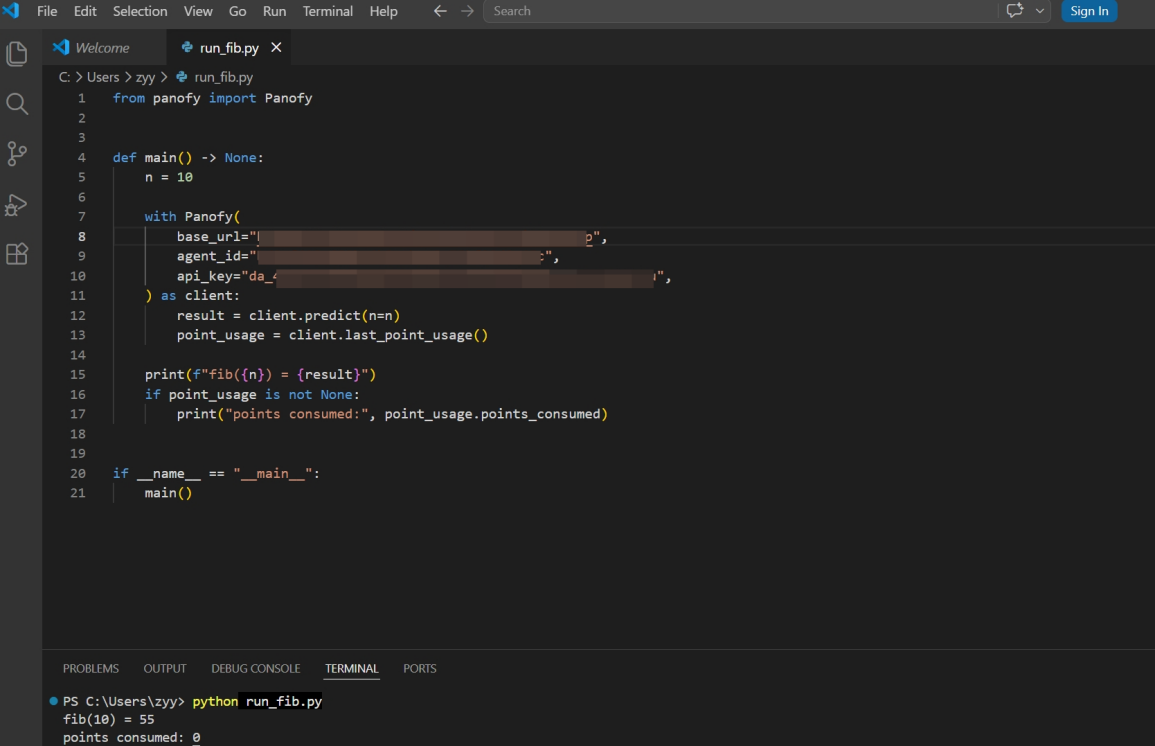
Python full example
from panofy import Panofy

def main() -> None:
    n = 10
    with Panofy(
        base_url="https://your-base-url.up.railway.app",
        agent_id="your-agent-id",
        api_key="your-api-key",
    ) as client:
        result = client.predict(n=n)
        point_usage = client.last_point_usage()
        print(f"fib({n}) = {result}")
        if point_usage is not None:
            print("points consumed:", point_usage.points_consumed)

if __name__ == "__main__":
    main()
Save the code as run_fib.py, then run it:
python run_fib.py
Since this Fibonacci Agent always returns type number, the output should be:
fib(10) = 55
If you are not using with, close the client manually when the program ends:
client.close()
TypeScript / Node.js full example
import { Panofy } from "panofy";

const main = async () => {
  const n = 10;
  const panofy = new Panofy({
    baseUrl: "https://your-base-url.up.railway.app",
    agentId: "your-agent-id",
    apiKey: "your-api-key",
  });

  const result = await panofy.predict({ n });
  const pointUsage = panofy.lastPointUsage();

  console.log(`fib(${n}) =`, result);

  if (pointUsage) {
    console.log("points consumed:", pointUsage.points_consumed);
  }
};

main().catch((error) => {
  console.error(error);
  process.exit(1);
});
Output should be:
fib(10) = 55
Appendix · Reference Notes
1. The field name must match the Agent's input definition
The examples use n because this Fibonacci Agent's input field is n. If your Agent's input field differs, replace it accordingly.
For example, if the field is input:
# Python
result = client.predict(input=10)
// TypeScript
const result = await panofy.predict({ input: 10 });
If the field is number:
# Python
result = client.predict(number=10)
// TypeScript
const result = await panofy.predict({ number: 10 });
2. Check the most recent point usage
After each predict() call, the SDK records the points consumed. Read the most recent usage like this:
# Python
result = client.predict(n=10)
point_usage = client.last_point_usage()
if point_usage is not None:
    print("points consumed:", point_usage.points_consumed)
// TypeScript
const result = await panofy.predict({ n: 10 });
const pointUsage = panofy.lastPointUsage();
if (pointUsage) {
  console.log("points consumed:", pointUsage.points_consumed);
}
3. Pass a local file as input
To send a local file (CSV, JSON, PDF, image, Word, Excel, etc.) to an Agent, pass the local file path as a plain string to predict(). This applies only to Agents trained to accept file input — not to the Fibonacci example.
With a local file ./data/report.csv:
# Python
result = client.predict(input_csv="./data/report.csv")
// TypeScript
const result = await panofy.predict({
  input_csv: "./data/report.csv",
});
4. Inspect Agents and tasks
Besides predict(), the SDK offers helper methods. They aren't required for a first integration, but are useful for troubleshooting.
4.1 List accessible Agents
# Python
agents = client.agents.list()
for agent in agents:
    print(agent.id, agent.name, agent.training_status)
// TypeScript
const agents = await panofy.agents.list();
for (const agent of agents) {
  console.log(agent.id, agent.name, agent.training_status);
}
4.2 Get a single Agent
# Python
agent = client.agents.get("your-agent-id")
print(agent.id, agent.name, agent.training_status)
// TypeScript
const agent = await panofy.agents.get('your-agent-id');
console.log(agent.id, agent.name, agent.training_status);
4.3 Create, update, delete an Agent
# Python
agent = client.agents.create(
    name="sales-report-agent",
    description="Analyze sales CSV files",
    model_id="PANOFY_AIR",
)
updated = client.agents.update(agent.id, name="sales-report-agent-v2")
client.agents.delete(agent.id)
// TypeScript
const agent = await panofy.agents.create({
  name: 'sales-report-agent',
  description: 'Analyze sales CSV files',
  model_id: 'PANOFY_AIR',
});
const updated = await panofy.agents.update(agent.id, {
  name: 'sales-report-agent-v2',
});
await panofy.agents.delete(agent.id);
4.4 List tasks
# Python
tasks = client.tasks.list(agent_id="your-agent-id", limit=10)
for task in tasks:
    print(task.id, task.status)
// TypeScript
const tasks = await panofy.tasks.list({
  agent_id: 'your-agent-id',
  limit: 10,
});
for (const task of tasks) {
  console.log(task.id, task.status);
}
4.5 Get a single task
# Python
task = client.tasks.get("your-task-id")
print(task)
// TypeScript
const task = await panofy.tasks.get('your-task-id');
console.log(task);
4.6 Delete a task
# Python
client.tasks.delete("your-task-id")
// TypeScript
await panofy.tasks.delete('your-task-id');